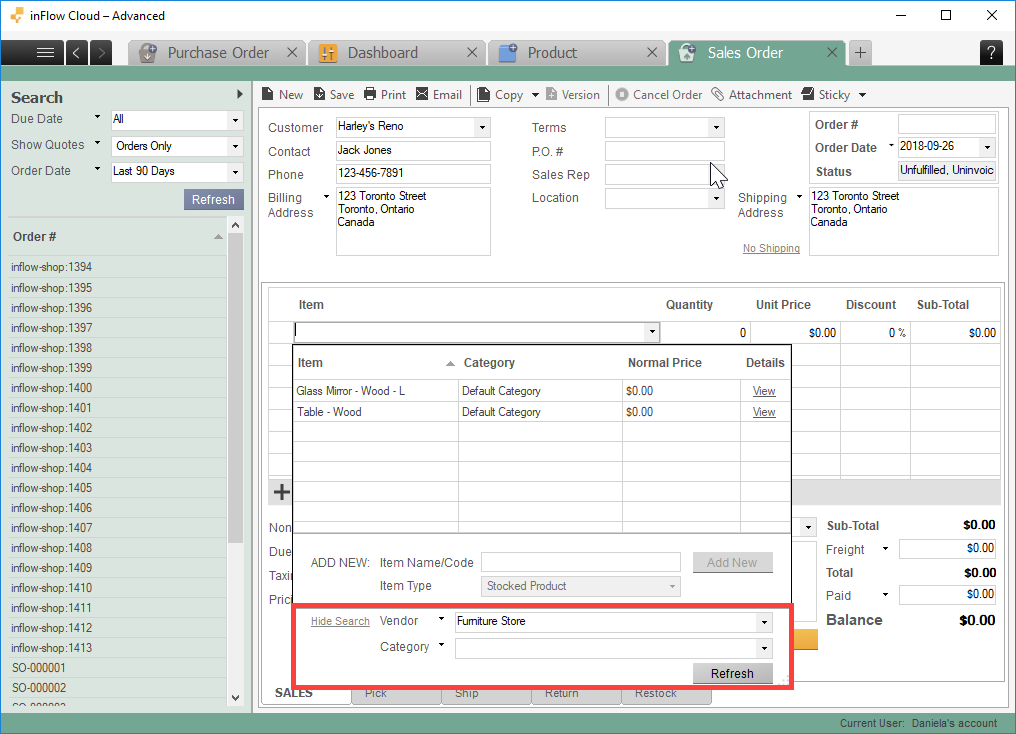
Sales orders in inFlow On-Premise let you track items that you sell to your customers. inFlow will automatically assign an order number the first time you save the order.
Even if you don’t need to track sales or sell any product, completed sales orders deduct inventory and can be used to record outgoing stock.
To create a sales order:
- Click Main Menu > Sales > New Sales Order .
- Begin by adding your customer information at the top of the order:
- If your customer is already in the system, you’ll see them highlighted as you type their name into the Customer field
- If your customer is not in your system yet, continue typing out the full customer name and click Add New to create a new record for them. As you fill out their contact information, inFlow will automatically save it to their product record.
- Add items to your order by clicking into the Item column and entering your product name.
TIP: When adding items to your order, you can filter your product selection by clicking Show Search in the product table. This allows you to quickly search for your products by vendor, category, price and other fields – right from the order!

To complete a sales order:
- Click Fulfill when your customer has received the items on the order. This will move the items out of your inventory.
- If your customer has not yet paid you, you can click the arrow button beside Mark Paid and select Mark invoiced. This will move the order to an Invoiced status. Printing an Invoice document will automatically mark the order as Invoiced.
- If your customer has paid for part of the order, you can put that amount into the “Paid” field to keep track. If they’ve paid the full amount, click Mark Paid to complete the payment.You can also click the “Paid” field to record more detailed information like reference or cheque numbers.
Video tutorial
What else can I do in the sales order screen?
There are other advanced things you can do from the sales order screen as well. You can:


