To create a count sheet:
- Go to Main Menu > Inventory > Count Sheet.
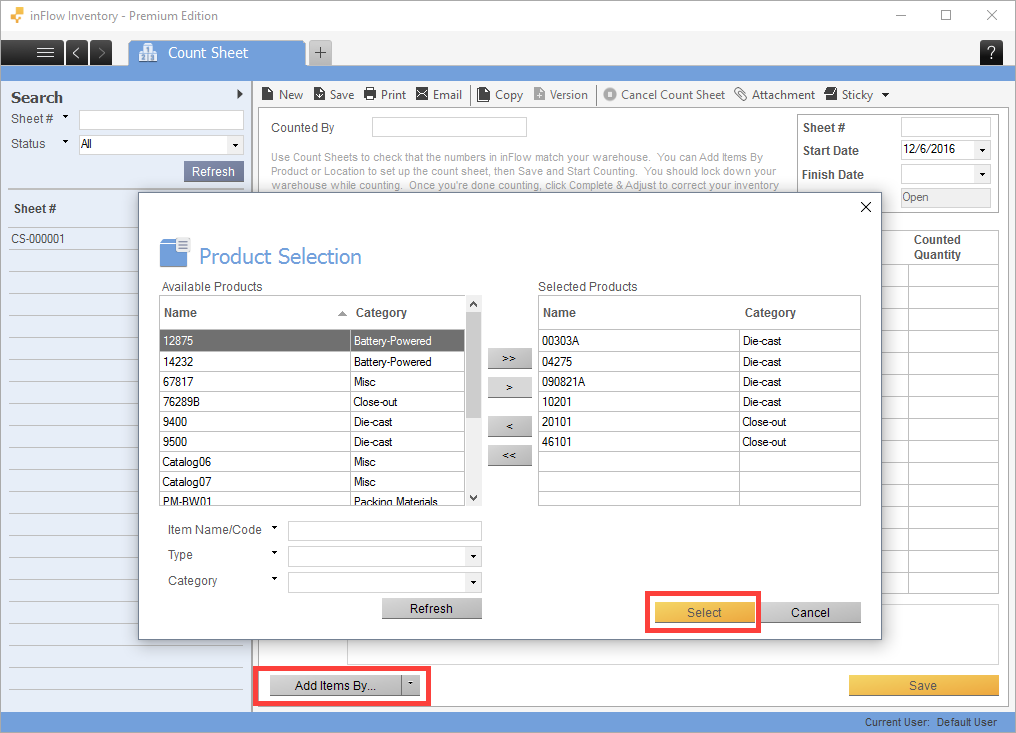
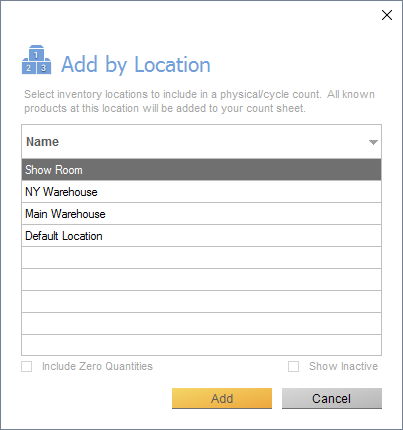
- Click the Add Items By… button and choose to add items by Products or by Location.

To add by Products:
- Select the items on the left that you would like to include in your count and move them to the table on the right using the buttons in the center.
- Once you’re satisfied with the list on the right, click Select.

To add by Location:
- Select the locations within the window that you’d like to add to the count sheet.
- Click Add.
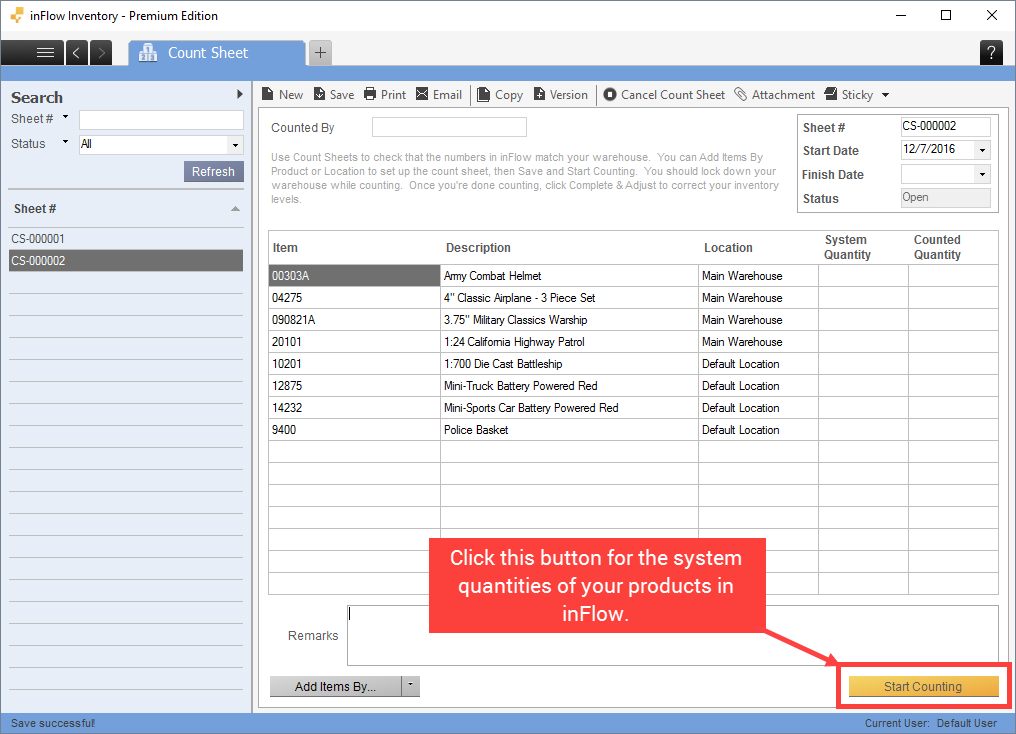
Once you have the items in the count sheet, you can print it as a list for completing your count. When you’re ready to start your count, click the Start Counting button to record the inventory numbers you have right now. This will fill the System Quantity column with inFlow’s numbers.
Keep in mind that this doesn’t prevent you from continuing business so if you continue to process items / move inventory around these numbers will no longer be accurate.

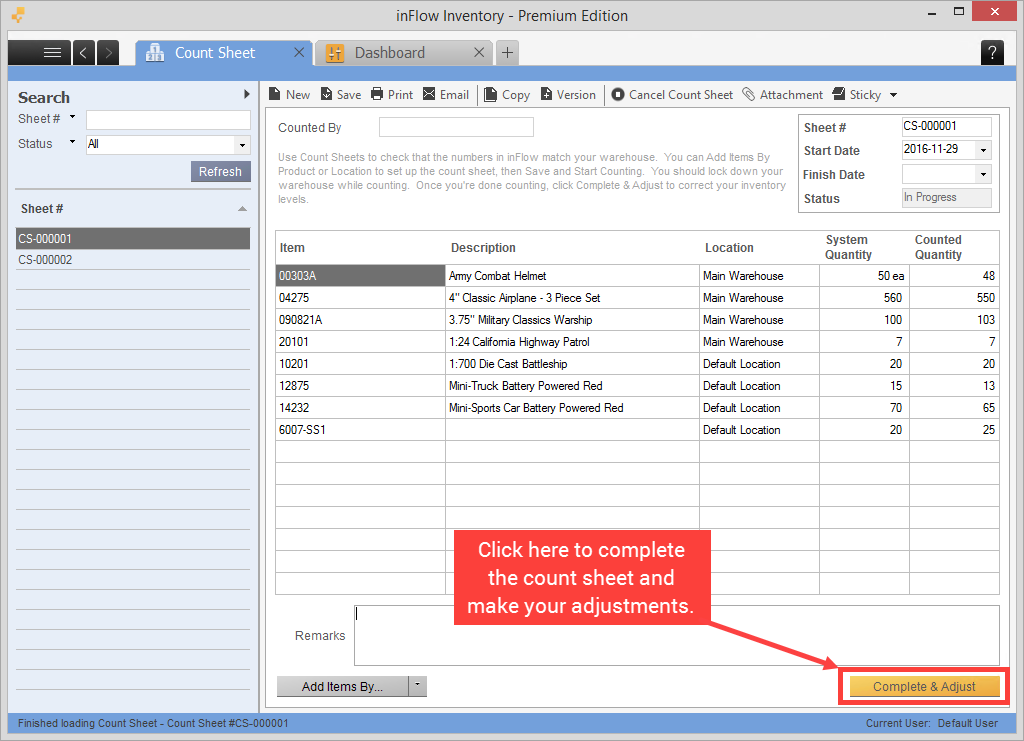
Continue doing your physical count. You can either write down the numbers on the printed list and input it into the Counted Quantity column all at once, or input directly one by one. If there’s no change to an item’s quantity you can just leave it blank.
Once you’ve finished entering the counted numbers, you will see the Complete & Adjust button at the bottom. Click this button to adjust the system quantity based on your counted levels.

When you’ve completed the count sheet, inFlow will save a record of the change and you can run the Count Sheet Report to look at any loss/ shrinkage.
You can also click the Uncomplete button if you need to re-open the count sheet (though note that your system quantities may have changed by then).


