
inFlow On-Premise includes your company details on documents such as invoices, receipts, purchase orders, etc. By entering your company data into the print settings window, this will put the data on all generated documents (except reports).
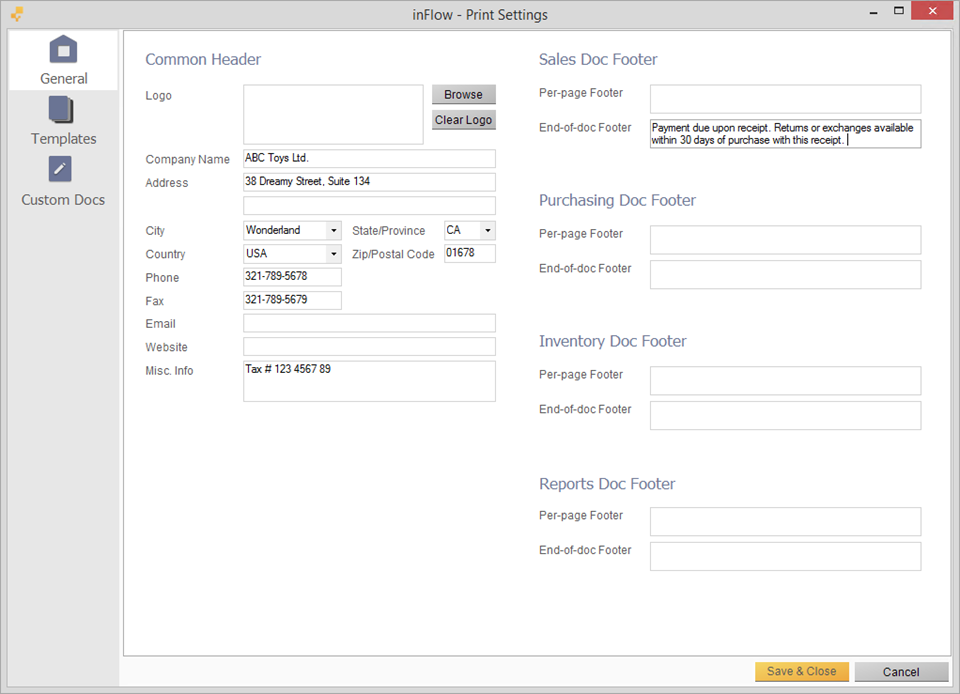
To update your company details:
- Go to Main Menu > Options > Print Settings.
- Click on General icon on the left (if not already selected).
- Enter your company details, logo etc.
- Click Save & Close.
Compatible image types for your company’s logo
In order to be used in inFlow, your company’s logo needs to be in either .jpg, .jpeg, .png, or .bmp formats otherwise they will not show up as an option to be imported into inFlow.
Changing the template
We have three different layouts/templates to choose from! You can also change the color, font, and font size of the layout you want to use.
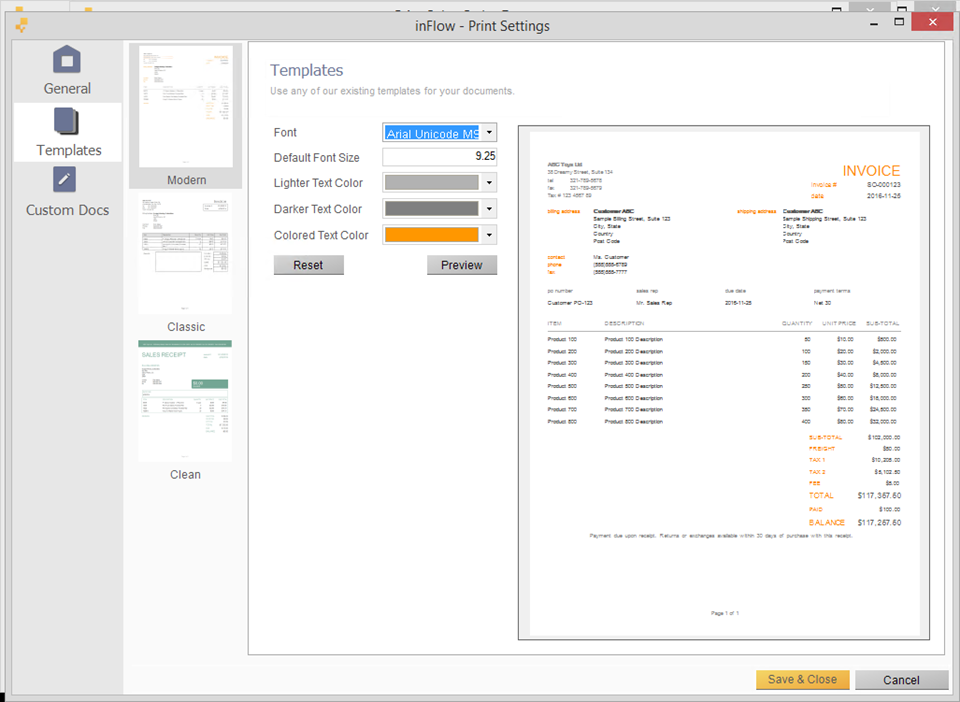
To change the template:
- Go to Main Menu > Options > Print Settings.
- Click Templates to see the three different templates available (remember not all templates will include your logo).
- Choose the template you like. You can preview it on the right window.
- Make any changes to color and font as you wish.
- Click Save & Close.
How to make the company logo appear bigger in printed documents
The Modern and Classic templates allow you to include your logo on printed documents. Both templates have a set space for your logo and it isn’t possible to make this space (and your logo) bigger.
With that in mind, here are some suggestions to try to make your logo appear bigger on printed documents:
Classic Template
The Classic template has a larger set space for the logo than the Modern template. If you have the Modern template selected, consider changing your template to the Classic template (Main Menu > Options > Print Settings > Templates).
Make your logo more square
The space allowed for the logo in the Modern and Classic templates is a square – if your logo is rectangular, it will appear smaller and will be as wide as the square space allocated. Making your logo more square will make it appear larger in the space provided.
Increase the size of your logo import file
It’s possible that your logo appears small because the logo in your imported file is small itself – try creating a larger version of your logo and re-importing it into inFlow in the Print Settings.
Why is there a black background on my logo?
Sometimes after adding a logo to inFlow you’ll see a black background behind it. This is caused by a transparency layer that’s on the logo file, and this can be fixed by removing this layer. See the steps below on how to do this in Microsoft Paint which is included on all Windows based computers. (Any advanced photo editing software will also work)
- Click on the Windows start icon in the bottom left hand corner of the screen, or press the Windows key on your Keyboard.
- Type in “Paint” and click on the desktop app search result.
- Go to File > Open and locate the logo file on your computer.
- Once the image has loaded go to File > Save As you will get a warning that you will lose the transparency that is on this image. Click OK on that warning
- Save the image to your computer as a .jpeg or .png file
- Open inFlow On-Premise and go to Main Menu > Options > Settings > Set company name, address etc…
- Click the Browse button, and locate the newly saved logo.
- Click Save.
Create your own custom document
If you’re unsatisfied with the size of your logo in the in-program templates, you can create your own Custom Document using Microsoft Word’s Mail Merge feature. Detailed instructions can be found here.


