These can be used to capture information that the system doesn’t natively track which you may wish to keep in your records for analysis or later reference. This is useful as custom fields can be used as a search filter or listed as a column in your reports.
inFlow can insert custom fields in many places, for example, having a product custom field gives you additional options to filter by such as “Manufacturer” or “Color”, and having a sales order custom field to enter more data per order, such as “Department” or VAT#, etc.
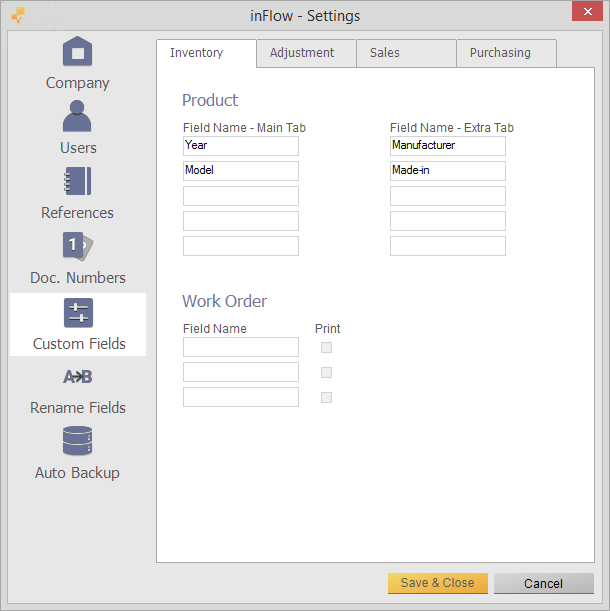
To set up custom fields:
- Go to Main Menu > Options > Settings.
- Choose the Custom Fields icon on the left.
- Select the correct tab (i.e. Sales = Customers, Sales Orders) according to where your custom fields should be.
- Enter your field names.
- Check the Print option if you’d like the custom field to show up on printed/exported records. If it’s an internal field only, uncheck it so that it only shows on the order screen but not on any printed documents
- Click Save & Close.