Many of our users choose Quickbooks as their accounting program. To that end we often get questions about how to import customers, vendors, sales etc. into inFlow so we thought we’d take a moment to show you where to look for the information you’re looking to grab. Quickbooks will also allow you to map the fields that are included in Excel files so that you can import information easily. This can be done for Customers, Vendors, Items and Accounts (the inFlow equivalent is Customers, Vendors, and Products, however please keep in mind that inFlow does not maintain accounts).
Before we start, if you’re looking for information on the inFlow side of things (i.e. how to import and export from inFlow) please have a look at these articles:
“Import Data into inFlow”, and
“Export Data from inFlow”.
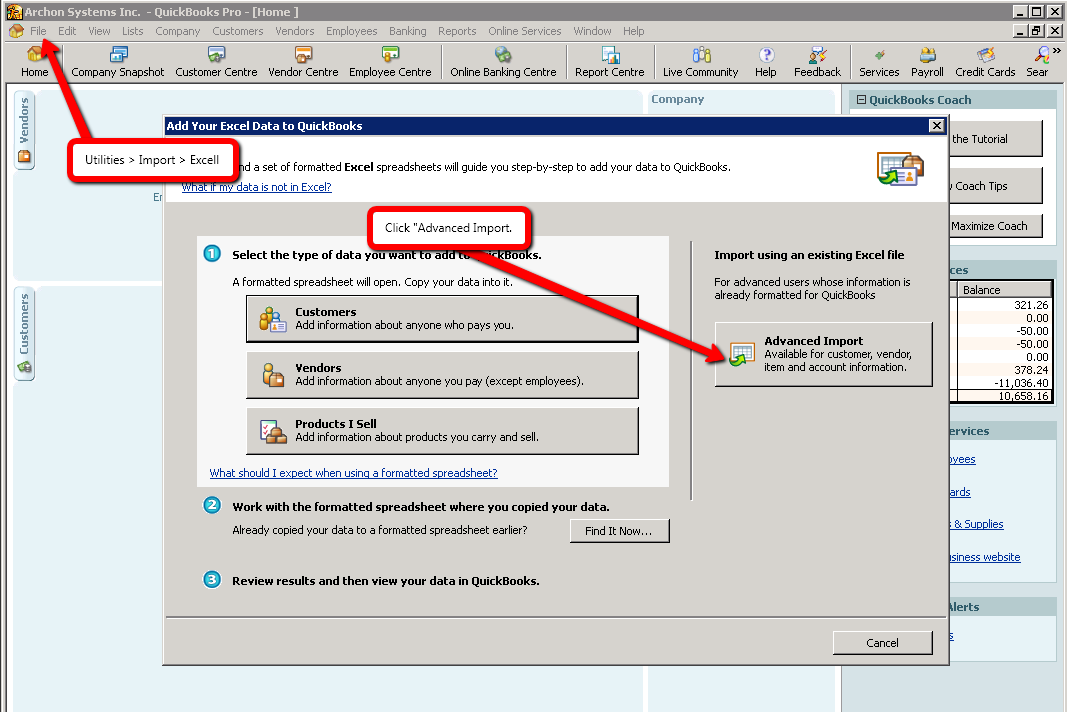
To import an Excel file for any of the above into Quickbooks first start the program then go to File > Utilities > Import > Excel (as below) and click “Advanced Import”
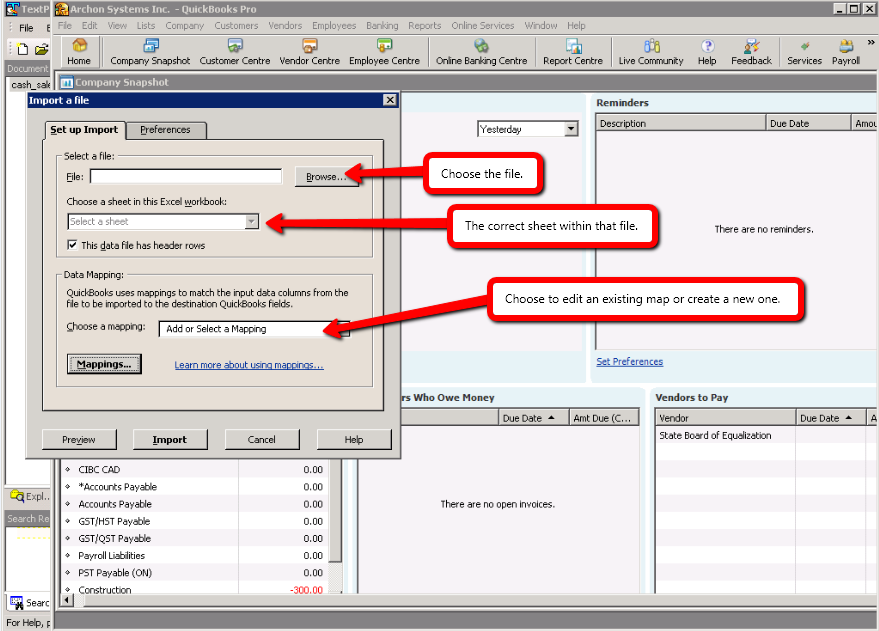
This will open a second window in which you may choose your file, the worksheet within that file and whether you’re creating a new map or updating an existing one:
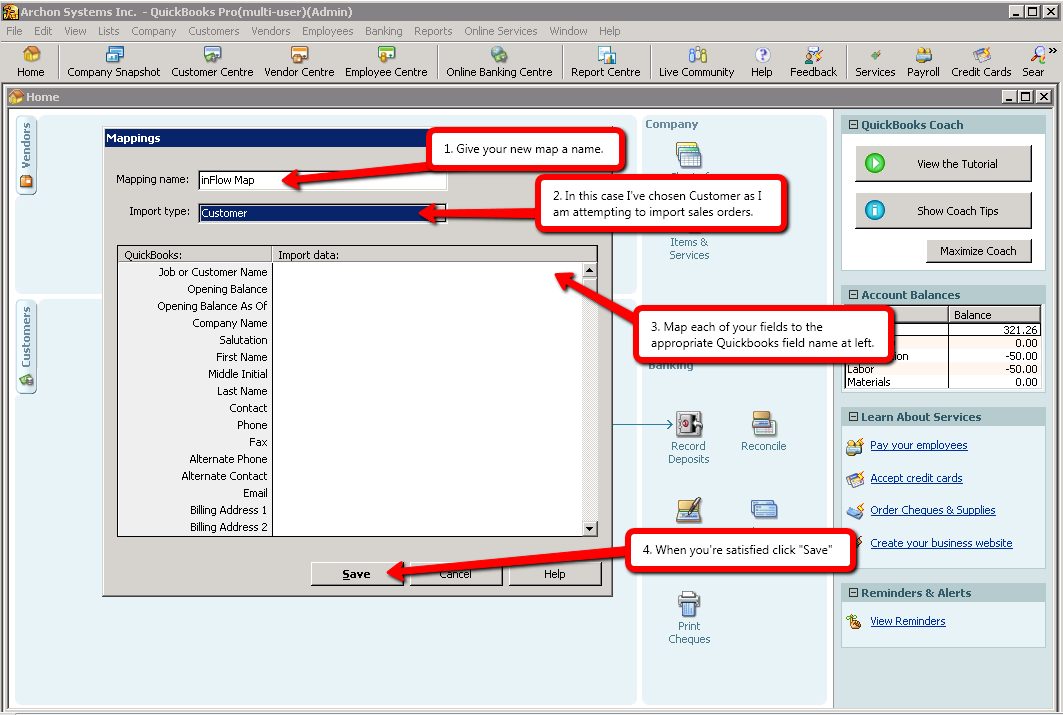
Now you can map the fields. You will see the Quickbooks field names on the left and you will be able to choose the correlated inFlow column header from the dropdown list at right:
When you’re happy with the information you’ve selected simply click “save” to complete the import process.
Yun LingArchon Systems
w,
e+1.866.923.4974
260 Carlaw Ave #397
Toronto,
ON,
M4M 3L1Canada
February 28, 2012


