
These instructions deal with how to create a Mail Merge Template using Microsoft Word 2003. There are a few Comma Separated Value files which have been included with your updated files and are available so that you may choose to link your Word document in order to create the custom fields you require.
In order to begin creating this custom document you will first have to create a word document and use the mail merge function to link it to one of our included templates. Please note that this version of the instructions is optimized for Microsoft Word 2003. To begin:
1. Open Microsoft Word and select the Main Menu button–>New and choose “Blank Document”.
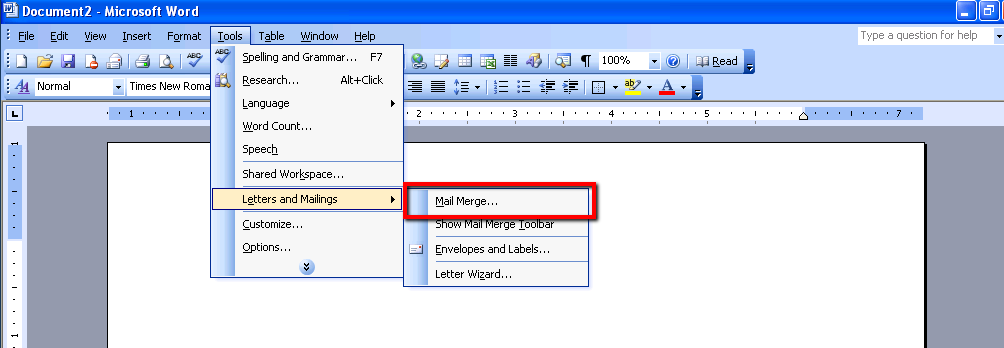
2. Under the “Tools” menu select the “Letters and Mailings” option and select “Mail Merge”
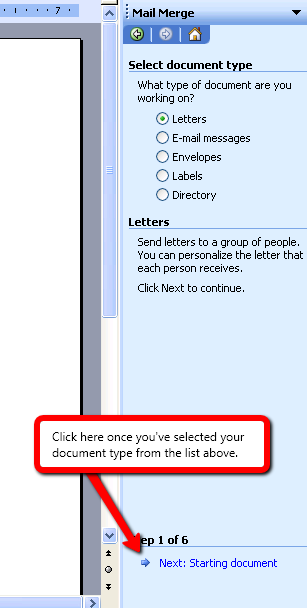
3. Select the type of document and click “Next” once you have done this.
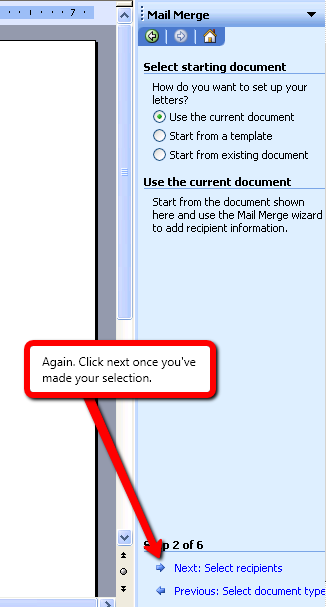
4. Choose which document you’re planning to use and then click “Next”.
5. Click to browse, this will open a window in which you should choose one of the sample documents which have been provided with the program. The documents will be located in the directory to which inFlow has been saved, for instance:
32-bit computers: C:Program FilesinFlow InventoryCustomDocument
64-bit computers: C:Program Files (x86)inFlow InventoryCustomDocument
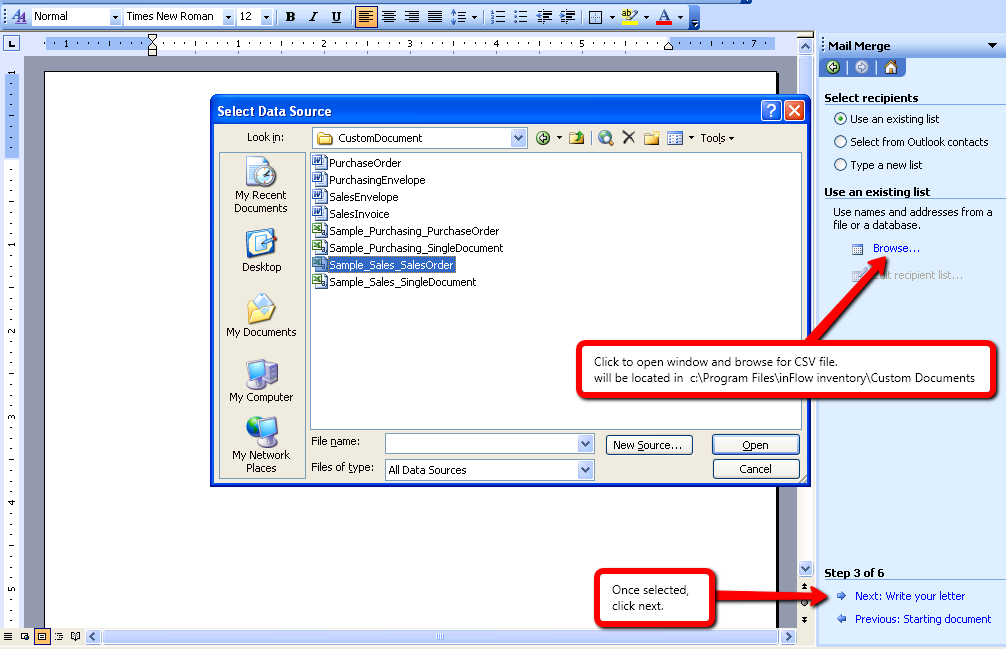
Once you have chosen your file click okay. This will close the window you have open and open a subsequent window. Click Okay on this and the next window. This will bring you back to the document you’re editing.
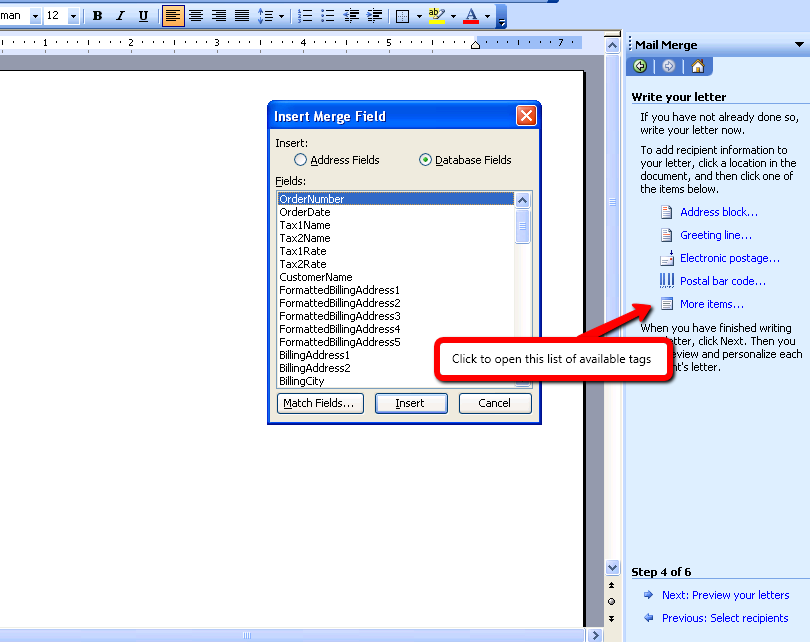
6. Click the “More Items” link on the right in order to open the window to “Insert Merge Field” button; there will be a list of available items in that window which you can use to insert into your file.
7. Once you’re satisfied with the document you’ve created save it and take note of the name and where it is located.*
8. Return to the program Go to the Print Settings menu (via Main Menu–>General Settings–>Print Settings)
9. Choose Custom Docs icon from the list on the left.
10. Click the “Add New Custom Doc” button. This will open the Custom Document selection window which will allow you to choose from four types of custom documents.
11. Skip step 1 and click the “browse” button beside step 2.
12. Locate and select the document you wish to use and click “open”.
13. Enter a name for the template you’ve just created.
14. Click the “OK”
15. You should now be looking at the Print Settings Window and if you are satisfied with your changes you may now click “Save and close”.
Congratulations! You have imported your template into inFlow Inventory and are now ready to use it to create a document.This process is quite similar if you’re looking to create a document of any kind by hand.
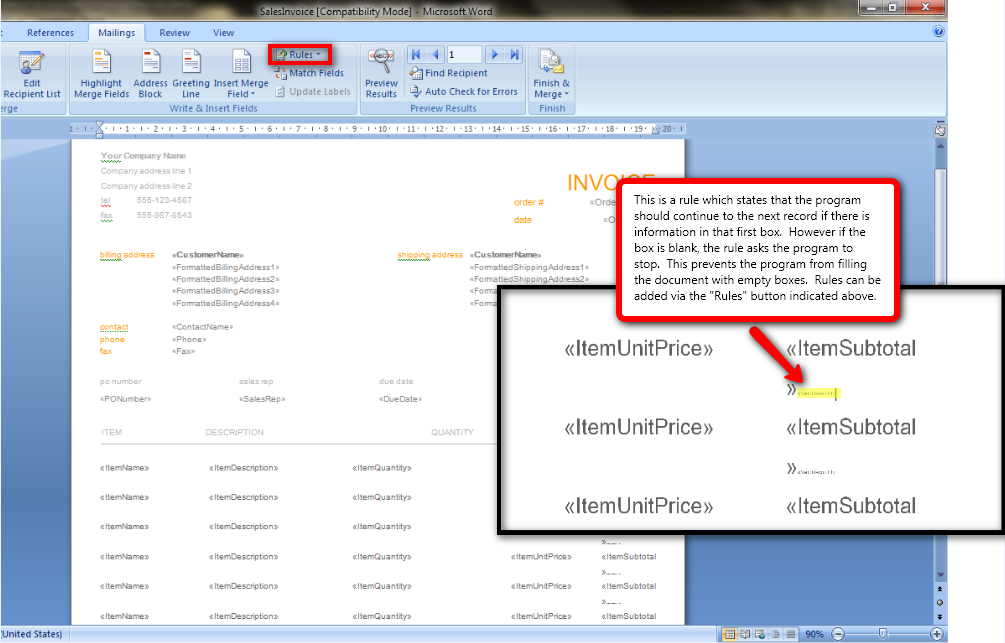
*Please note: If you’re creating a custom document using this method you will need to be careful to tell the program where to look and when to stop. For instance, if you’re including sales order information in a letter to your client you will need to tell the program to stop entering information if the next line is blank. If you take a look at our example templates you will find that we have added a rule to the document which states that if the next <> field is blank it should not continue and this can be done via the rules button in the mail merge tab (see below).
For information on troubleshooting please visit this article: https://onpremise.inflowinventory.com/software-support.aspx#/article?21111338
