
So you want to add a new type of document to inFlow? Maybe some documents you use are specific to your particular region or industry, or you just want to streamline your process. Good news: you can create a custom document using Microsoft Word’s Mail Merge feature to let you link that document directly to inFlow, though it’s important to keep in mind that only purchase or sales related documents are possible.
We’ll cover three things in this article:
- Making Changes to a Sample Document
- Linking Your Document to a Data Source
- Adding Tags to your Document
- BONUS: some example documents
To begin you’ll want to start with one of our sample documents (these are included with your installation). If you’re looking for instructions for Word 2003 please see here.
Making Changes to a Sample Document
This is the easiest way to start using custom documents and lets you play with an existing template to see how it works. Remember you’ll have to add your company name and details so that they are included on your printed document.
To open a sample document:
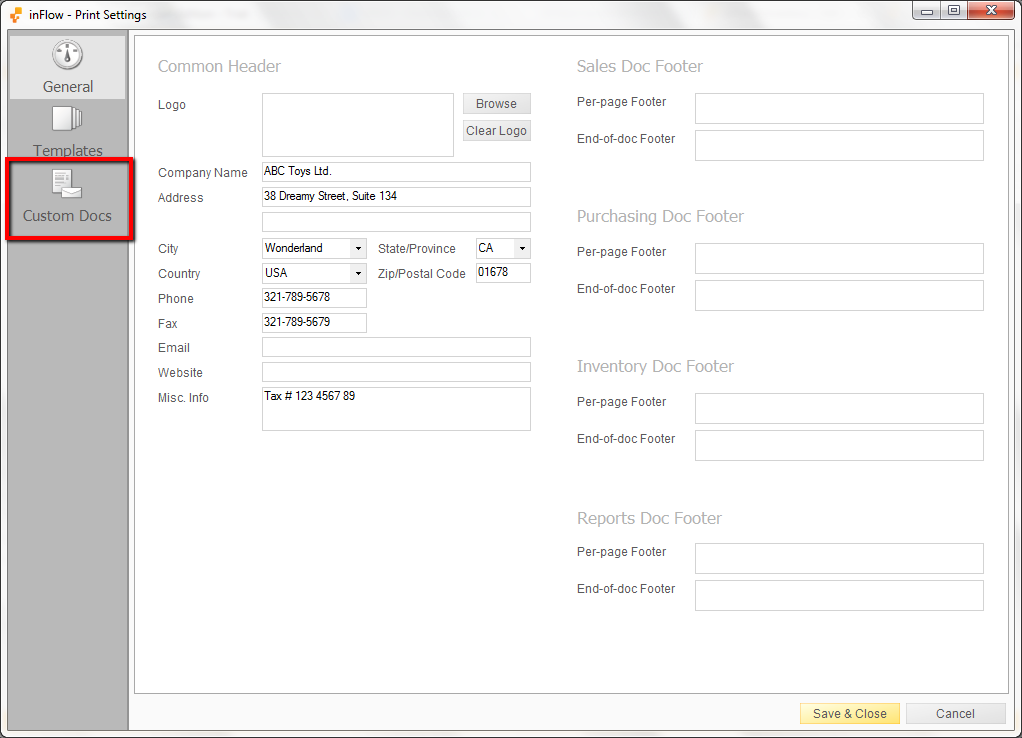
1. Go to Main Menu > Settings > Print Settings
2. Choose Custom Docs from the icons on the left
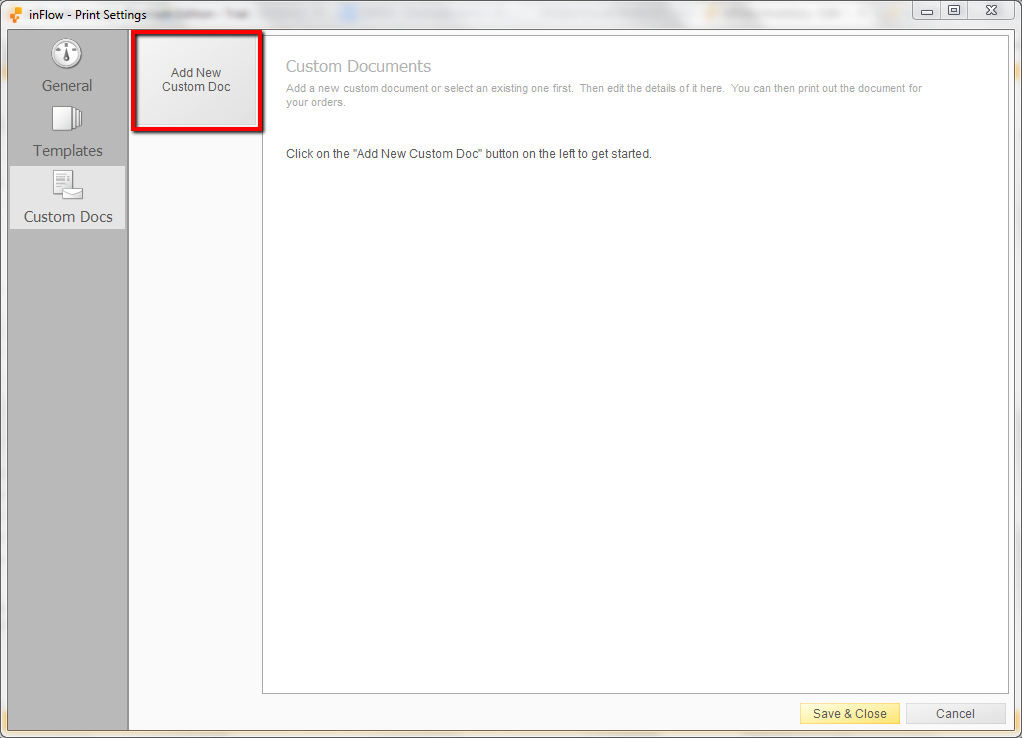
3. Click the Add New Custom Doc button.
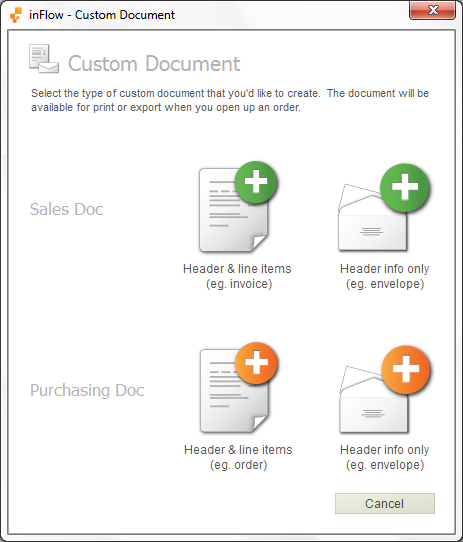
4. Choose one of four types of documents (eg. To create a Sales Order document choose Sales Order, Header & Line Items)
5. Click Open Sample.
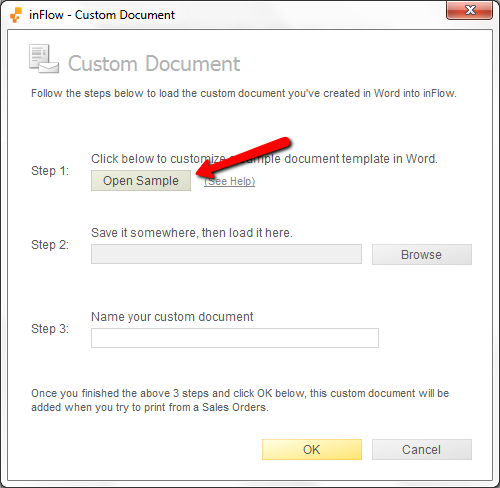
Microsoft Word will open up the sample document so that you can make changes to the placement of certain items, or the information that’s included.
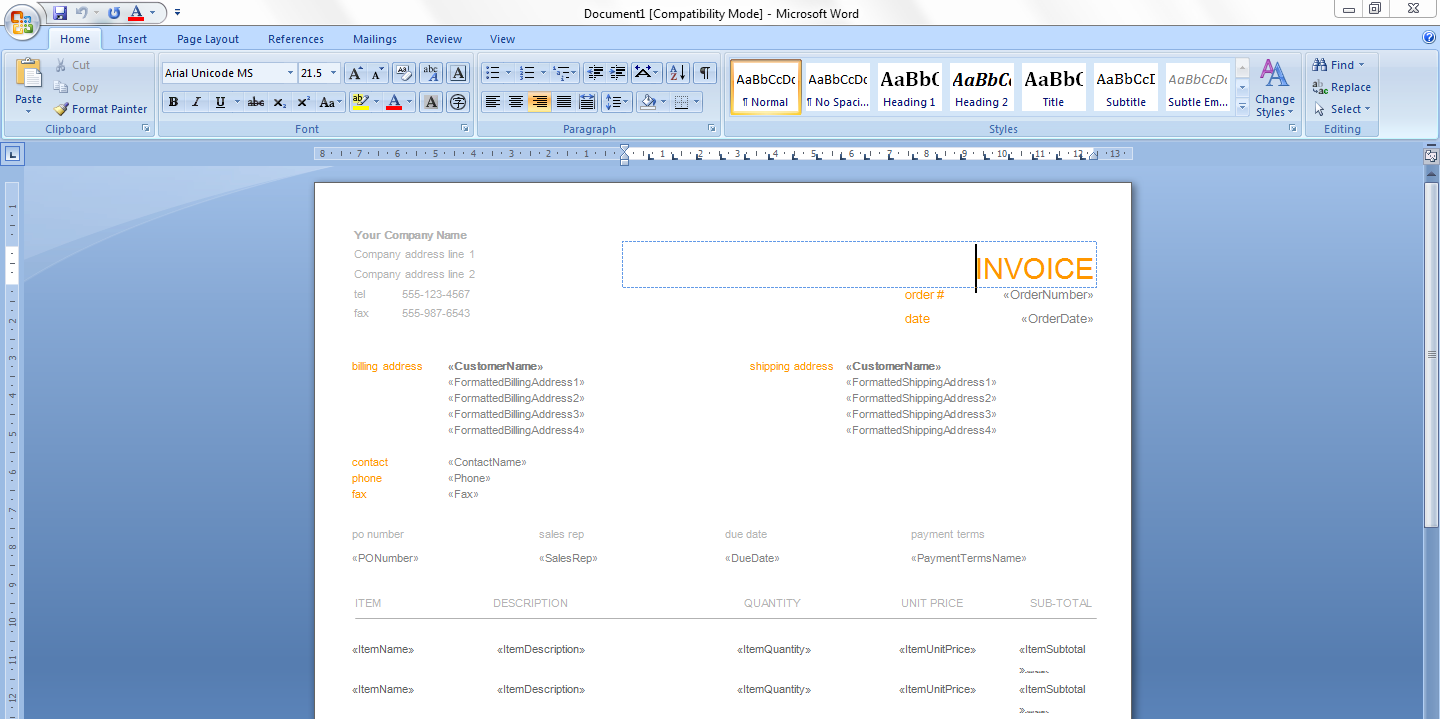
If you’d like inFlow to show additional information on this document (such as a custom field for example) you’ll need to add tags as described in the Adding Tags to your document section below. In both cases, you’ll need to follow the steps under Linking your sample document below.
Linking Your Document to a Data Source
Linking to your data source means you’ll know what information inFlow can include on your document and where you want it to be. This is done by tagging once you’ve followed the steps below but more on that later!
This step needs to be followed any time you’re going to ADD tags to a document (whether new or one of our samples). If you’re just removing tags then you can skip this step and just save your document.
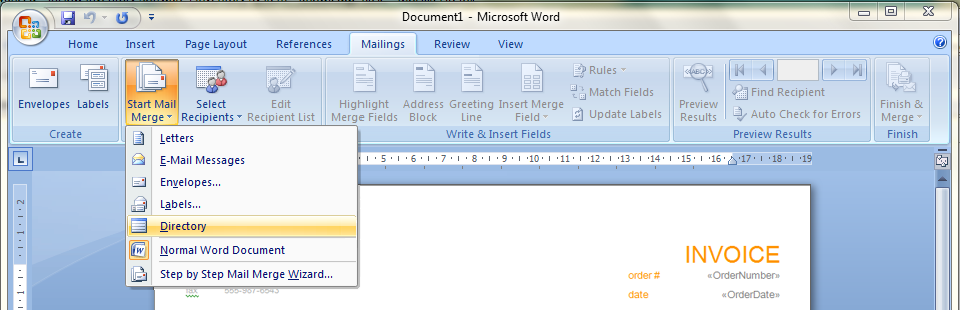
To link your document:
1. Open your sample document as described above.
2. Click the Mailings Ribbon and choose Start Mail Merge.
3. Choose Directory from the list.
4. Click Select Recipients and choose Use Existing List…
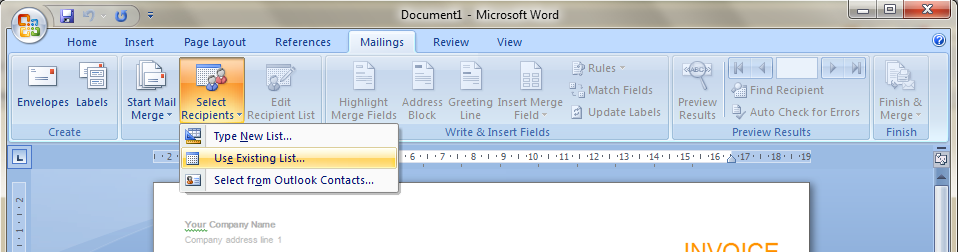
This will open a window in where you can browse to the correct CSV file. There are four available which can be found in C:Program FilesinFlow InventoryCustomDocument (on a 32-bit computer) or C:Program Files (x86)inFlow InventoryCustomDocument (if your computer is 64-bit).

Depending on what information you want available you’ll choose your file, please see below for a short description of each file, which should help give you an idea of which one you might want to link to:
-Sample_Purchasing_PurchaseOrderLines.CSV: all the available tags from a purchase order including items, pricing, order info etc. You would use this if you were creating your own purchasing invoice.
-Sample_Purchasing_SingleDocument.CSV: order level information like your vendor’s address. You might use this if you wanted to have inFlow address your envelopes for sending out your purchase orders.
-Sample_Sales_SalesOrderLines.CSV: all the available tags from a sales order including items, pricing, order info etc. You would use this if you were creating your own sales invoice.
-Sample_Sales_SingleDocument.CSV: order level information like your customer’s address. You might use this if you wanted to have inFlow address your envelopes for sending out your invoices.
Now that you’ve linked your document to that source file you can insert the available fields via the Insert Merge Field button. There will be a dropdown list of available tags to add.
Adding Tags to your document
Adding tags lets you choose where something should be placed on your document. Let’s say your document is a letter to your customer and you want to call them by their name. In that case it might look something like this:
Dear <>
Thank you for purchasing from our company!
Sincerly,
Me
This lets inFlow know that you want the customer’s name placed directly after the “Dear” within the letter.
To add your tag:
1. Put your cursor where you’d like the new tag to appear
2. Click Insert Merge Field
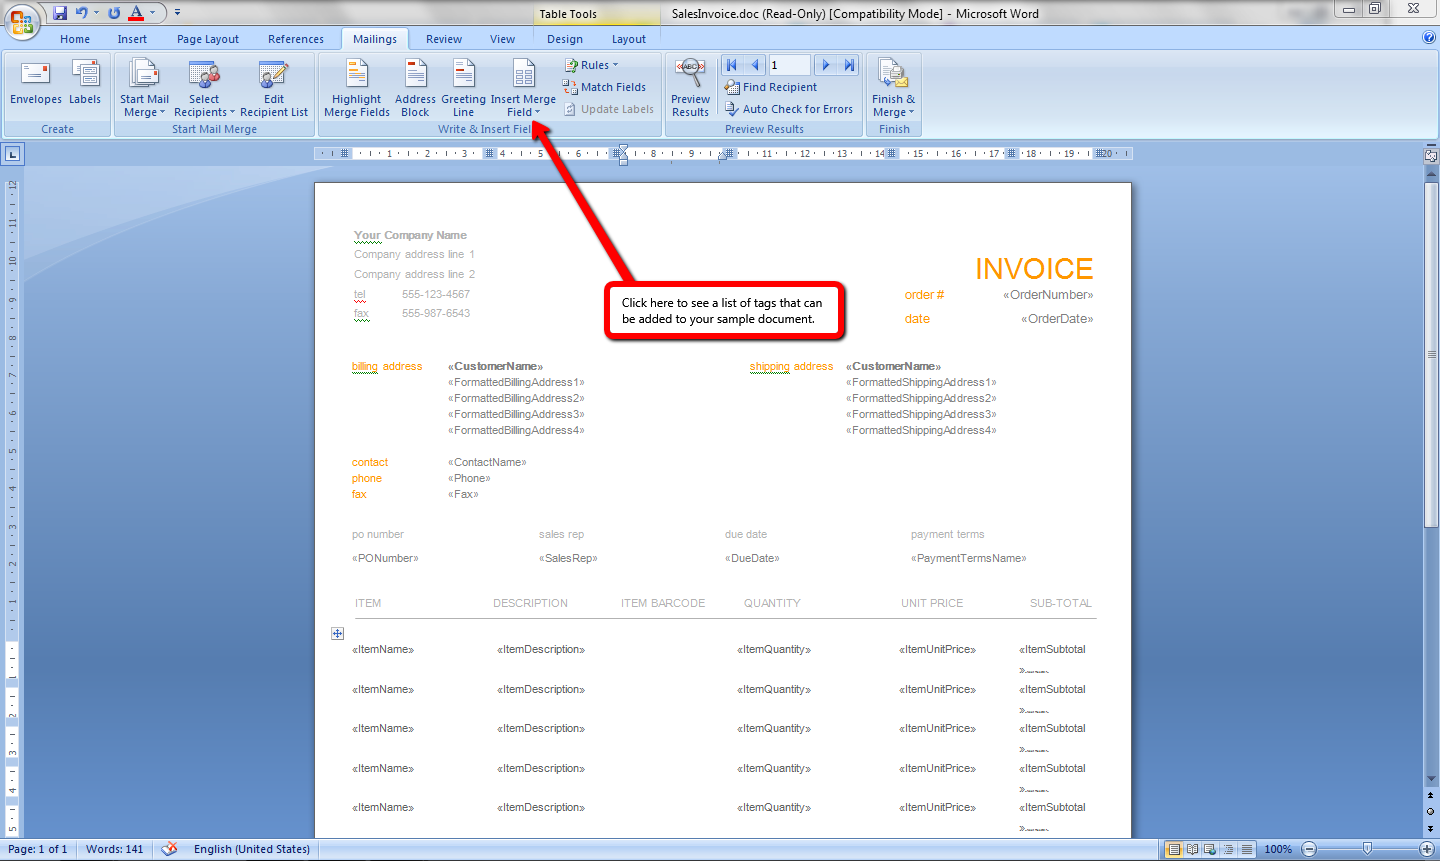
3. Choose the tag you want from the resulting list.
This will place your tag into the document so that inFlow knows where you want that information to be once printed. As an example, you might want to add the item barcode into your invoice as in the example above. When you’re finished adjusting the document save it to your desktop (or anywhere you can easily locate it).
Now that you’ve created your custom document you’re ready to Use Your Custom Document.
Here are some other sample documents for you
These are document templates that you can import into inFlow. See instruction on how to import custom document templates.
- The inFlow in-program templates: Classic, Clean, Modern
- Documents with Barcodes: Invoice, Price labels
- Receipt (for POS / cash registry)
- Invoice with VAT tax
